Connect to your first controller
Add a Fanuc or Yaskawa controller with the guide: brand, address, protocols and passwords, the test in plain words, which protocol does what, what TouchUp learned about the robot and the Hello TouchUp! check. Connect, edit in the guide, choose a robot.ini, order the controllers.
- Before you start
- Open the guide
- Brand
- Address
- A ROBOGUIDE robot (Fanuc)
- Try without a controller
- Protocols
- Fanuc
- Yaskawa
- Save
- Which protocol does what
- What TouchUp learned about your robot
- Check it is the right robot
- Connect and disconnect
- Test Connection
- When it fails
- Edit or remove a controller
- Choose a robot.ini (Fanuc)
- Order the controllers and move them between files
- What to read next
This page shows how to add a Fanuc or a Yaskawa controller to TouchUp and connect to it, with the guide Add a controller. The guide asks for the brand, the address and the passwords, tests the connection, saves and connects, then shows what TouchUp learned about the robot. It takes about one minute when the controller is ready for the network.
Before you start
- The PC and the controller are on the same network, and the controller answers a ping from the PC.
- The controller is set for the remote access: see Prepare a Fanuc controller or Prepare a Yaskawa controller.
A ROBOGUIDE virtual controller also works for Fanuc. MotoSim does not answer the network protocols of Yaskawa: a Yaskawa connection needs a real controller.
Open the guide
In the desktop application and in the web application, the guide opens by itself at the first start, as the welcome page. The web application is opened at http://localhost:<port>/, see Install TouchUp.
At any time, click + at the top of the Controllers view, or run TouchUp: Add Controller from the command palette (F1). The TouchUp side bar starts with Controllers, Watch, Toolbox and Backups, then Registers, Variables, I/O, Tasks and Variable Map, and ends with Account. Controllers, Watch and Account are open at the first start, the other views are closed. Registers, Variables, I/O, Tasks and Variable Map are still there, after Backups: their values are also in Watch. The Controllers view lists the controllers already declared.
The guide goes through these pages. Nothing is saved before Save: close the page to cancel.
| Page | What you do |
|---|---|
| Brand | Choose Fanuc or Yaskawa |
| Address | Type the address, test the connection |
| Protocols | Type the users and passwords, test, save |
| Which protocol does what | Read how TouchUp uses the protocols of this controller |
| What TouchUp learned | Read what TouchUp found on the controller |
| Check it is the right robot | Show a message on the controller |
Brand
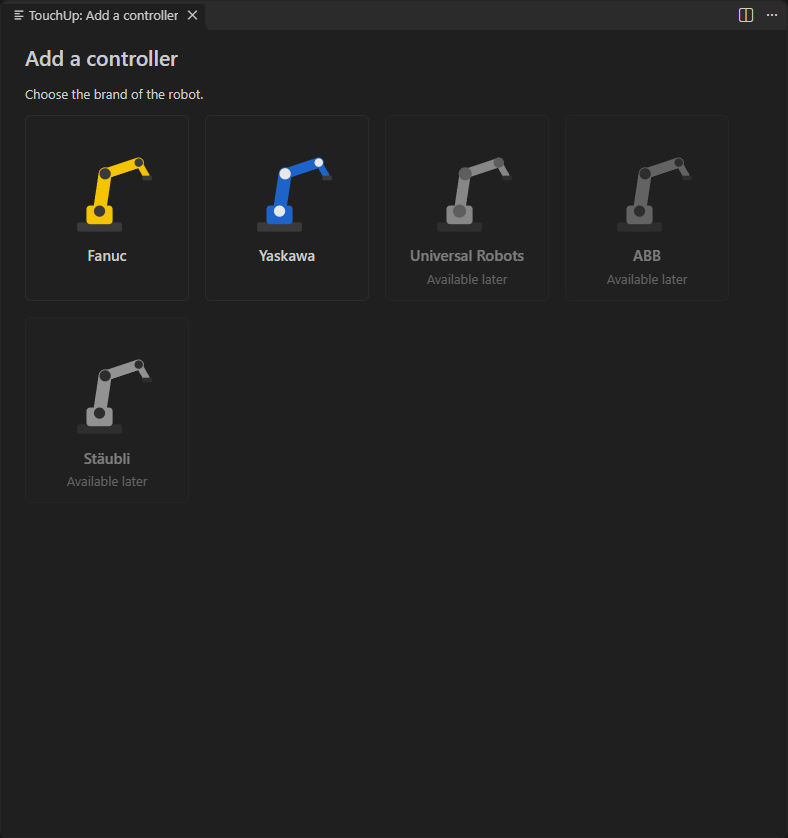
Click the picture of the brand: Fanuc or Yaskawa. The other brands are grayed out with "Available later".
Address
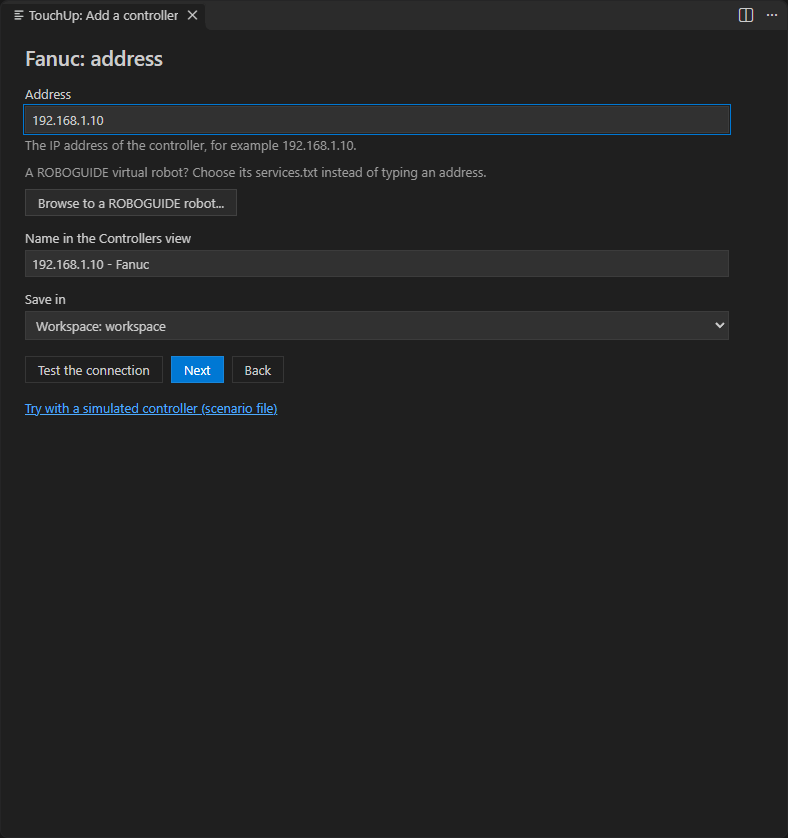
Enter the IP address or the host name of the controller. The text under the field gives an example.
- Name in the Controllers view. It is shown in the views and in the status bar. TouchUp proposes the address and the brand: change it to the name of the cell or of the robot.
- Save in. When a folder is open, choose where to declare the controller: Workspace, the
.touchup/config.jsonfile of the open folder (good for a project or a cell folder, the file can be shared with Git), or Global, the~/.touchup/config.jsonfile, which shows the controller in every window. See Controllers and configuration files. - Test the connection. TouchUp checks the controller and tells the result in plain words: "The controller at the address answers: TouchUp can connect to it", or what to do, in numbered steps, the most likely cause first. See When the connection fails.
A ROBOGUIDE robot (Fanuc)
A ROBOGUIDE virtual robot runs on your PC. Click Browse to a ROBOGUIDE robot... and choose the services.txt file of the robot, in its folder of the workcell (<workcell folder>\Robot_1 by default). The address becomes 127.0.0.1, and TouchUp reads the ports of the robot in that file. Use the address instead goes back to a normal address.
Try without a controller
Try with a simulated controller (scenario file) plays a scenario file as if it were a controller. Nothing is sent to a robot. Use it to try TouchUp without a controller.
Protocols
TouchUp talks to a controller with one or several protocols. Click Next on the address page.
Fanuc
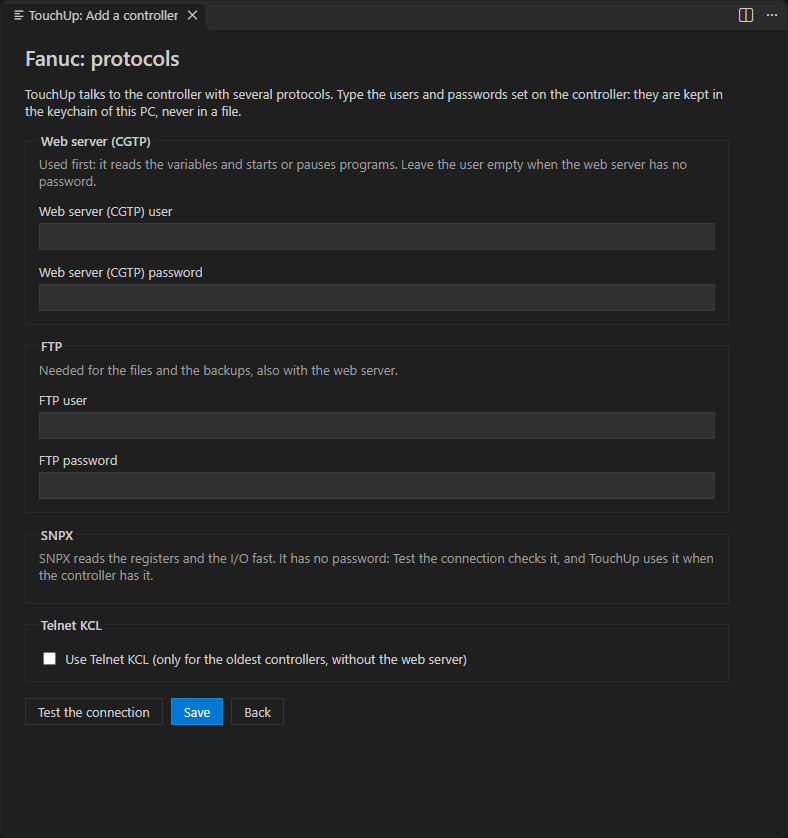
Type the users and the passwords that are set on the controller. They are kept in the keychain of the operating system, never in a file.
| Protocol | What you give |
|---|---|
| Web server (CGTP) | A user and a password. TouchUp uses it first: it reads the variables and starts or pauses programs. Leave the user empty when the web server has no password |
| FTP | A user and a password. They are needed for the files and the backups, also with the web server. Without a user, the controller logs in at the OPERATOR level, see Prepare a Fanuc controller |
| SNPX | Nothing: it has no password. Test the connection checks it, and TouchUp uses it to read the registers and the I/O fast when the controller has it |
| Telnet KCL | Only for the oldest controllers, without the web server. Tick Use Telnet KCL: the page lists the steps on the pendant (MENU, SETUP, Host Comm, TELNET, DETAIL, a password for the KCL feature, then a cold start of the controller) and asks for the same password |
Yaskawa
TouchUp uses the High Speed Ethernet Server (HSES) of the controller for every task, on the UDP ports 10040 and 10041. It has no password. Test the connection checks it.
Save
Test the connection works on this page too. Click Save: TouchUp declares the controller in the file you chose, and connects to it. The passwords go to the keychain. If the connection fails, the controller stays in the list with the state "lost" and the reason: see When the connection fails.
Which protocol does what
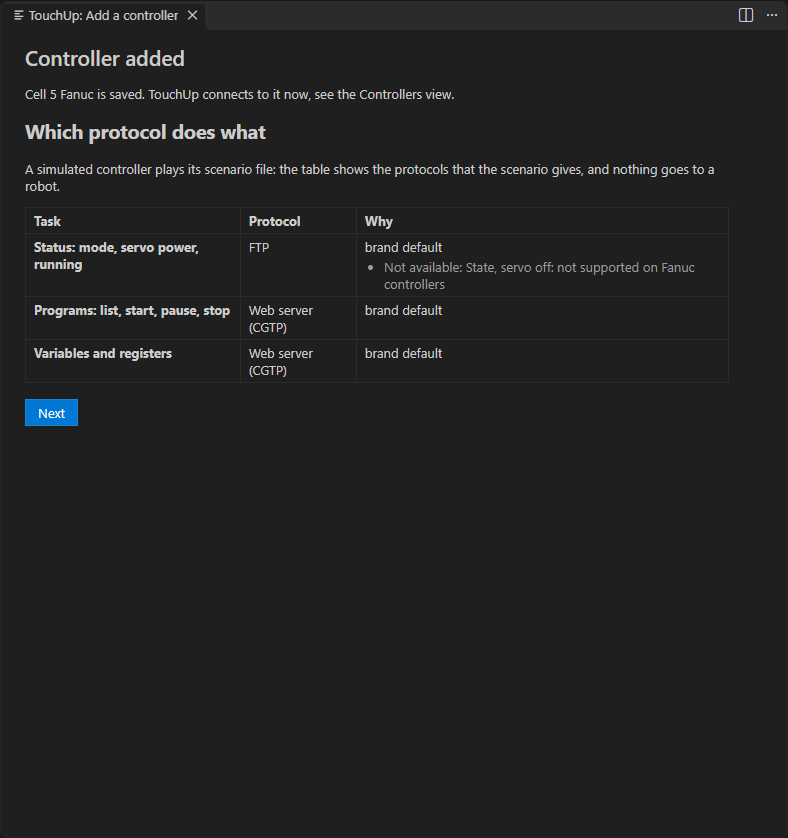
Once connected, the guide shows a table: for each task (identity, status, programs or jobs, debugging, variables, I/O, files and backups, alarms, positions), the protocol that TouchUp uses on this controller, and why.
- Fanuc. TouchUp chooses the protocol that does each task best on this controller. SNPX reads values fast, the web server reads variables and starts or pauses programs, FTP transfers the files and makes the backups, Telnet KCL is for the oldest controllers. When a protocol is missing (turned off, no password, no option on the controller), only the tasks that need it are disabled, and the table says which and why with "Not available". The other tasks still work.
- Yaskawa. HSES does every task. The choice of the protocol of each task is grayed out: there is no other protocol. If HSES does not answer, nothing works:
Test the connectionsays how to enable it.
What TouchUp learned about your robot
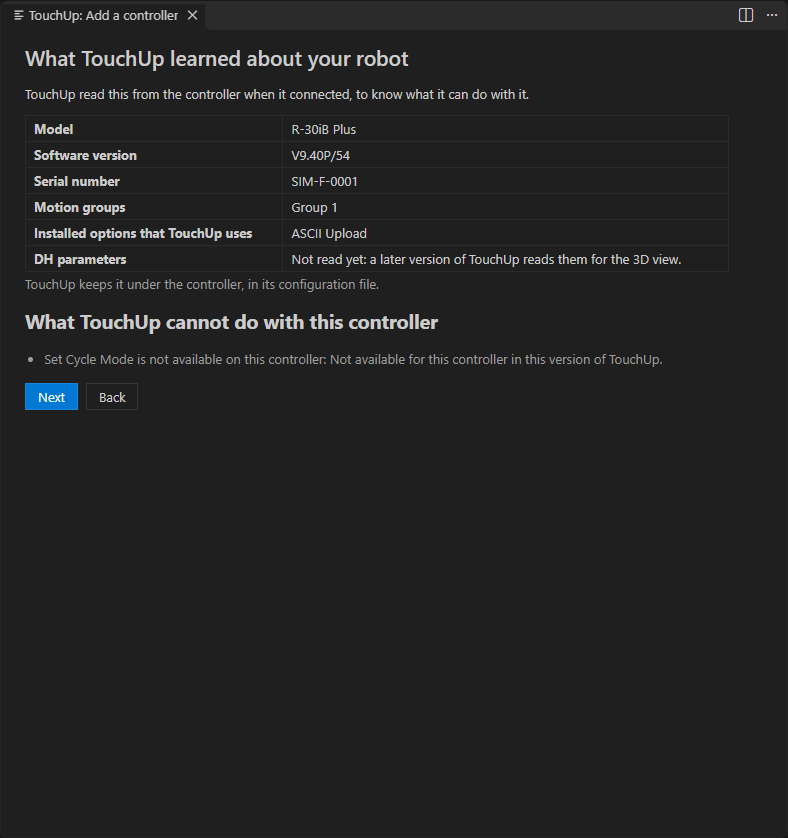
Click Next. The page lists what TouchUp read once, to know what it can do with this controller:
| Row | Content |
|---|---|
| Model | The model of the controller |
| Software version | The version of the controller software |
| Serial number | The serial number |
| Motion groups | The groups and their number of axes |
| Installed options that TouchUp uses | For example ASCII Upload or SNPX on a Fanuc controller |
| DH parameters | "Not read yet". TouchUp reads them when you open the 3D view, see Robot 3D |
A row is "Not given by the controller" when the controller does not tell. TouchUp keeps what it learned with the controller. Under the table, the list What TouchUp cannot do with this controller names each command that is not available, with the reason.
Check it is the right robot
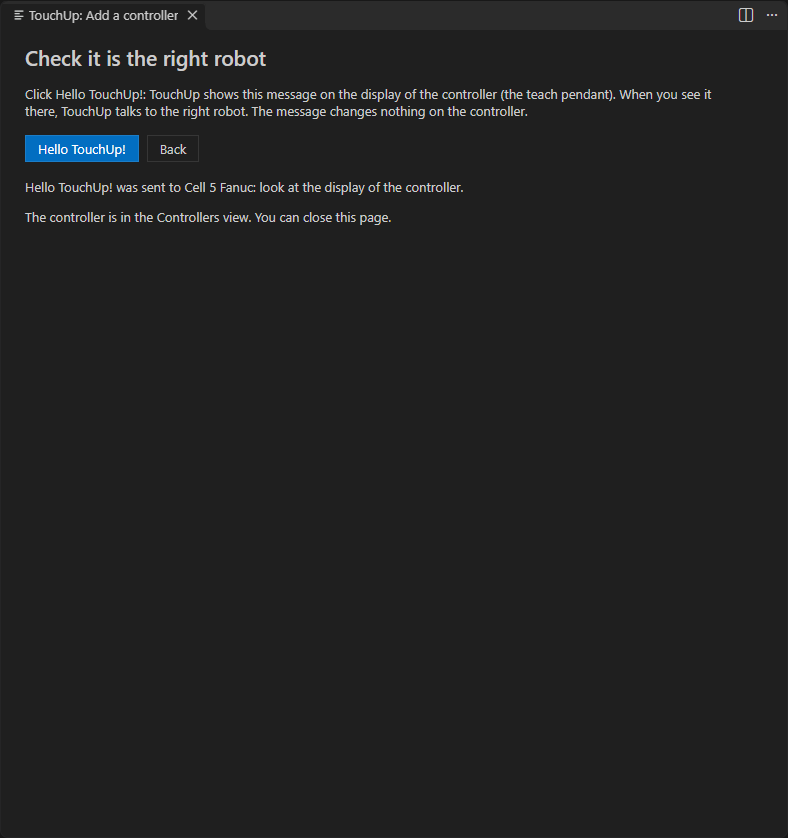
Click Next, then Hello TouchUp!. TouchUp shows this message on the display of the controller (the teach pendant): when you see it there, TouchUp talks to the right robot. The message changes nothing on the controller, it is free, it needs no confirmation, and TouchUp sends it only when you click.
A controller that cannot show a message has the button grayed out, with the reason on the page. The real Fanuc and Yaskawa controllers do not offer this display function yet: the button is grayed out on them. The same button, Identify, is in the Status view, see Status and status bar.
The controller is now in the Controllers view. You can close the page.
Connect and disconnect
The guide connects at the end of Save. The controller node opens and shows its status. A connected controller is also shown in the status bar.
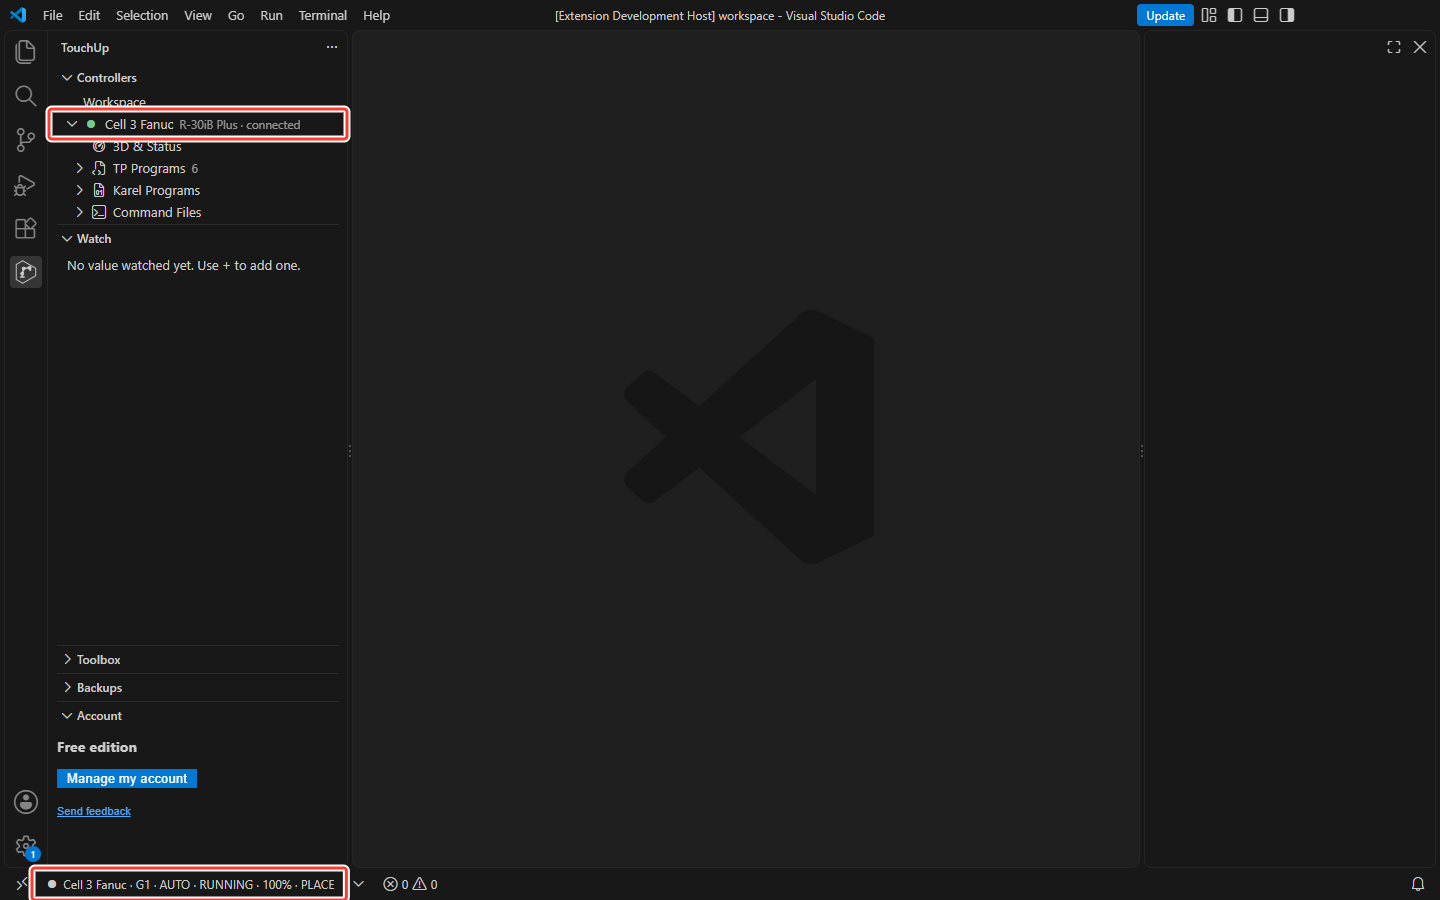
Later, hover a controller and click its Connect or Disconnect button, or run TouchUp: Connect and TouchUp: Disconnect.
Test Connection
TouchUp: Test Connection (right click on a controller) checks the network and each connection of the brand, without connecting. Run it first when a connection fails.
When it fails
The controller stays in the list with the state "lost" and the reason. Show Connection Report gives the probable causes and the settings to check on the controller. See When the connection fails.
Edit or remove a controller
Right click a controller:
Edit ControlleroffersEdit in the guidefirst. It opens the same pages as above, filled with the values of the controller: the address, the name, the users, the ROBOGUIDE robot, Telnet KCL. The brand is kept. A password left empty keeps the saved one, and the passwords are never shown.Saveconnects the controller again. If a user comes from another configuration file, the guide says so and does not remove it: change it in that file. The other choices areOpen the configuration file,Change user and password(Fanuc), and on a Fanuc controllerChoose robot.ini (WinOLPC)...andRemove robot.ini, see below.Remove Controllerdeletes it from its file, and deletes its password from the keychain.
Choose a robot.ini (Fanuc)
The tool maketp of WinOLPC, which compiles a TP program, can read an optional robot.ini file. On a Fanuc controller, Edit Controller then Choose robot.ini (WinOLPC)... opens a file picker. The file you choose is passed to maketp as its /config file, for this controller only. Remove robot.ini goes back to the default. Without this setting, TouchUp passes no file. See Compile with maketp.
In a .touchup/config.json file of the workspace, a path inside the workspace is saved relative to the .touchup folder, so that the file can be committed to Git and shared:
"winolpc": { "config": "../tools/robot.ini" }
A path outside the workspace, or in the global file, is saved as an absolute path. If the robot.ini file does not exist, the TouchUp output shows a warning with the name of the file and of the setting. The controller stays usable.
The command TouchUp: Choose a Path Setting picks a path for three other settings: touchup.backend.path, touchup.fanuc.winolpcPath (the WinOLPC tools folder) and touchup.catalogs.local (your catalog files).
Order the controllers and move them between files
The Controllers view shows two lists under separator lines: Workspace, the controllers of the .touchup/config.json of the open folder and of its parent folders, and Global, the controllers of ~/.touchup/config.json. Without an open folder, only the global list is shown.
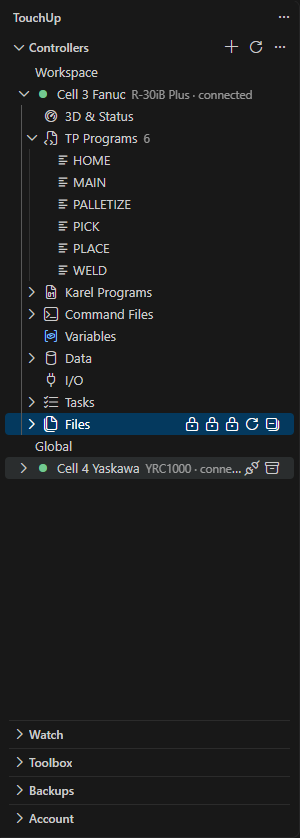
- Reorder: drag a controller onto another controller of the same list. It takes that place, and the order is saved in its file.
- Move to the other list: drag a controller onto a controller of the other list, onto the separator line, or onto the empty area under the list to put it at the end. The controller moves from one file to the other.
A notification says where the controller went, with an Undo button. The id of the controller, its saved password and its backups do not change. The path of a robot.ini is converted: relative in a workspace file, absolute in the global file.
Two limits. A controller cannot be dropped on a controller of another .touchup file of the same list, and a move is refused when the destination file already declares a controller with the same id. TouchUp does not show if a drop is possible while you drag: a refused drop shows a warning.