How it works
UnderAutomation.Robotics in four diagrams: one library for five robot brands, the RobotController and its 10 services, the connect line that changes with the brand, and how the protocol of each method is chosen. Then what to read next.
UnderAutomation.Robotics is one library that connects your application to Fanuc, Yaskawa, Universal Robots, ABB and Stäubli controllers with the same code. This page shows how it works in four diagrams, then tells you what to read next.
One library, five brands
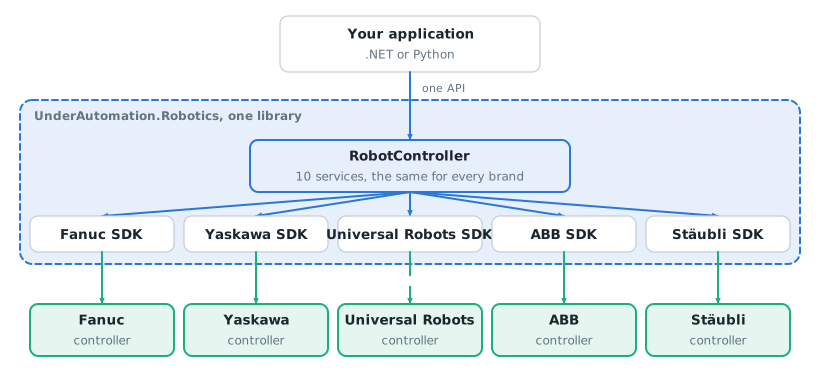
Your application references one .NET library, or one Python package. Inside, RobotController is the common API, and the five brand SDKs do the work on the controller.
Nothing to install on the PC: no software of the robot maker, no driver, no USB key. The library uses the interfaces that the controller already has.
One object, ten services
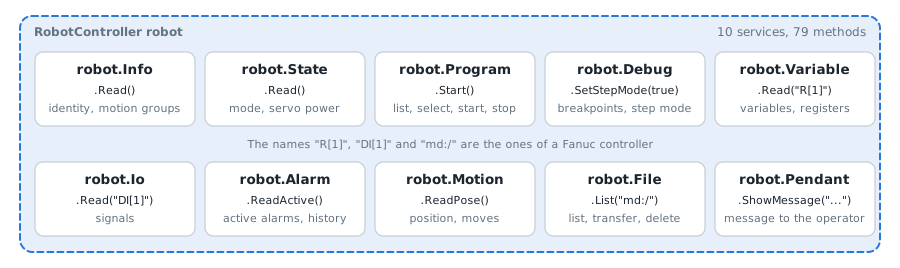
You work with one object, RobotController. Its 79 methods are grouped in 10 services: Info, State, Program, Debug, Variable, Io, Alarm, Motion, File and Pendant. A call is always robot.Service.Method().
Some brands do not have every method. IsAvailable of each service tells you before the call. Each service has its page, see Common API.
What changes with the brand: the connect line
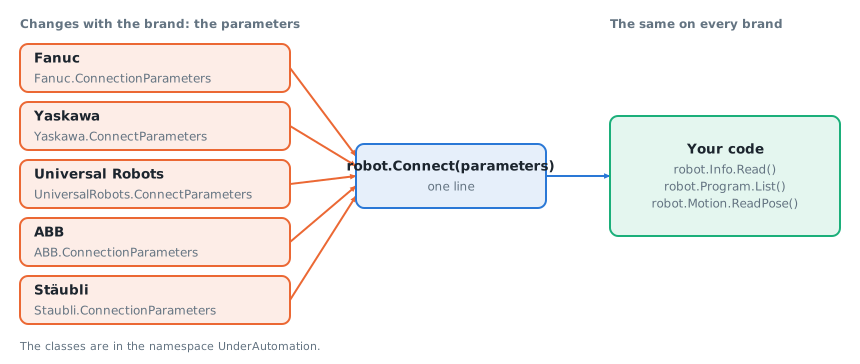
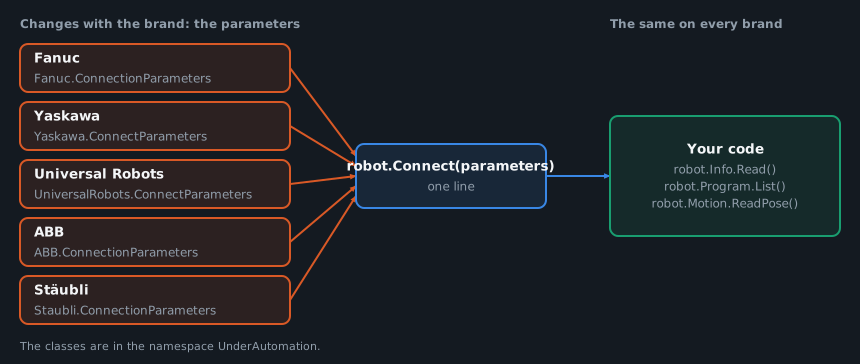
Each brand has its class of connection parameters. You pass it to Connect, and the library knows the brand from it. The code after this line does not change from one brand to another.
The names you pass to a method stay the ones of the controller: R[1] is a register of a Fanuc controller, another brand has its own names. The how-to articles give them for each brand.
One protocol per method, chosen for you
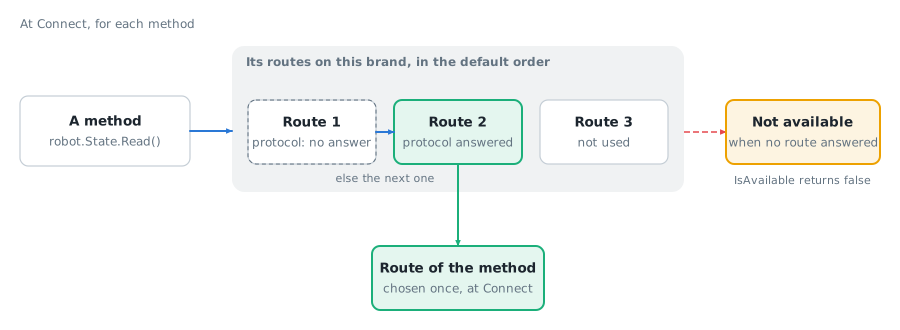
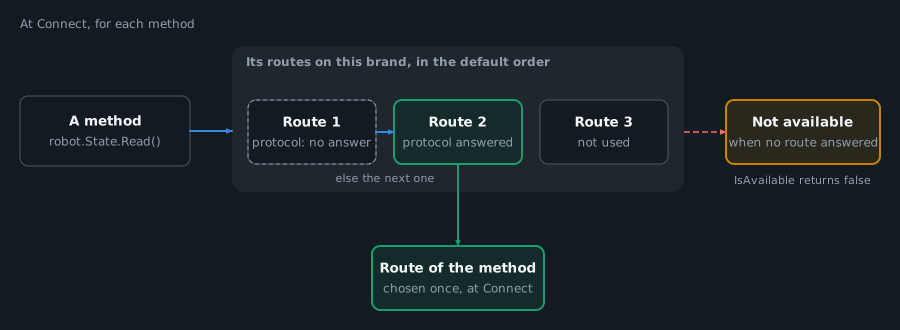
A controller has several interfaces: a web server, an FTP server, a protocol for the signals, another for the moves. For each method, the library has a list of these protocols, called routes, in a default order. At Connect, each method takes the first route whose protocol answered.
You do not choose a protocol to start. You can read the route of each method, and change the order when you need to: see Routing.
What to read next
- Install. Get started with .NET or Get started with Python: the package and a first program. Also for Matlab and LabVIEW.
- Connect. Connect to your robot: the connection parameters of each brand. No robot at hand? See Work without a robot.
- First calls. How-to articles: variables, IO, programs, position, alarms, files, state and moves, one code per task.
- Go further. Routing for the protocol of each method, Errors for the exceptions, Licensing for the trial and the keys.
Your project already uses a brand SDK? See Migrate from a brand SDK.