Connect to the robot
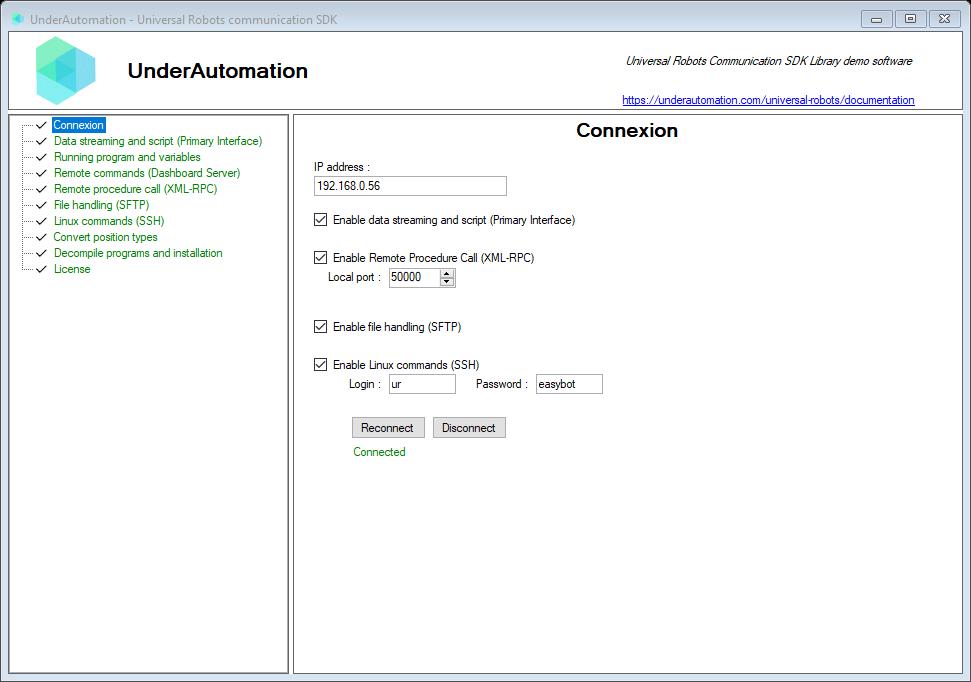
Several connection options allow you to choose which services you want to use through this SDK.
Configure the robot
IP adresses
Your robot must be accessible via the network from your PC. You must therefore set consistent IP addresses and have the same subnet mask.
To change the IP address in Polyscope, go to the menu at the top right / Settings / System / Network.
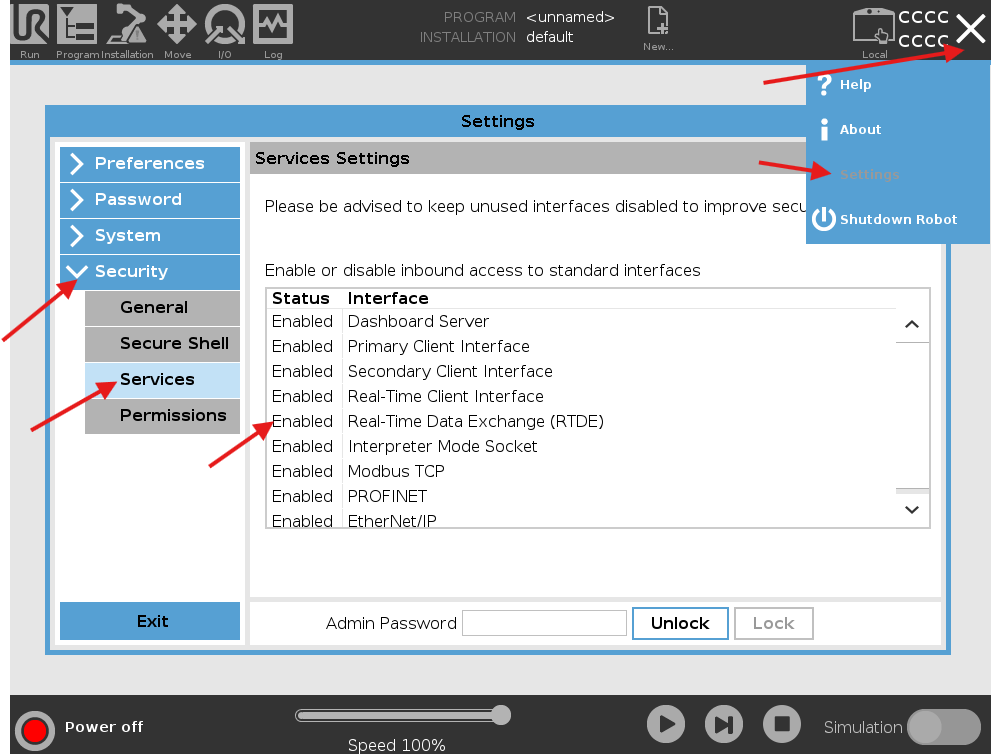
Enable services
For each protocol you intend to use (RTDE, Dashboard, Primary, ...), it is necessary to activate it in the settings for security reasons.
Go to the menu at the top right / Settings / Security / Services.
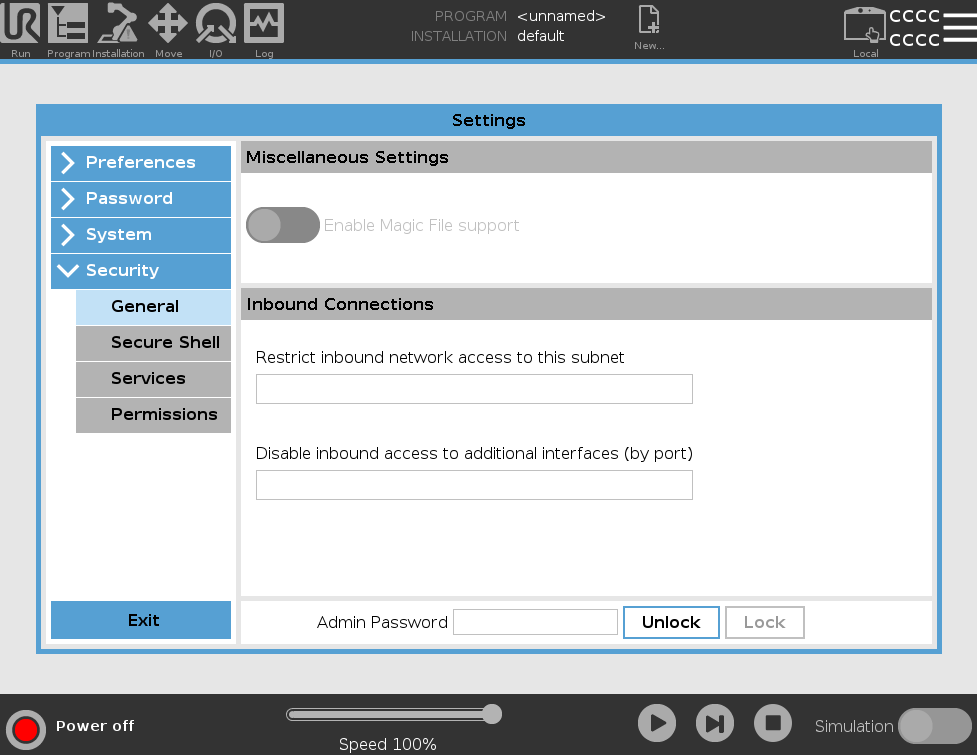
Inbound connection
In the menu at the top right / Settings / Security / General, you should not have any restrictions on incoming connections, at least none that prevent access to the TCP ports of the protocols used by the SDK.
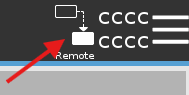
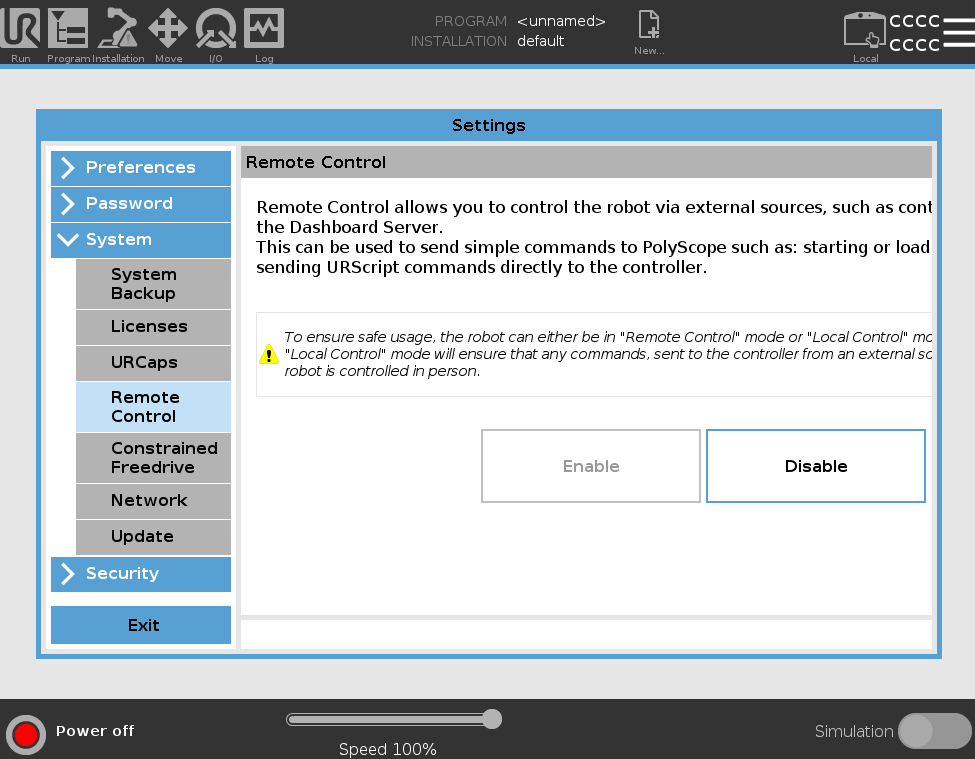
Remote mode
To enable command sending (Dashboard command, script sending via Primary Interface, RTDE writing), you must switch to remote mode using the icon at the top right of Polyscope.
To activate this button, you must enable remote mode in the settings.
Firewall and antivirus
It is common for your PC's antivirus and firewall protections to restrict connections to these protocols specific to Universal Robots. If the connection fails, you can temporarily disable your protections to test the connection, if possible.
You can then add the exception to your firewall configuration. The TCP ports used are described in the Services menu of the Polyscope security settings.
Connect
After creating an instance UR of your cobot, you need to call the Connect method to initiate communication with the robot.
This method takes as parameter a ConnectParameters object which describes the functionalities to be activated and the parameters of each feature.
The Connect() method can throw a InvalidLicenseException if your trial period is over or if your license key is invalid.
Please refer to the specific page for each protocol to understand the parameters.
using UnderAutomation.UniversalRobots;using UnderAutomation.UniversalRobots.Rtde;public class Connect{static void Main(string[] args){// Create a new robot instancevar robot = new UR();// Create parameters and enable all services you needvar parameters = new ConnectParameters("192.168.0.1");// Enable Primary Interfaceparameters.PrimaryInterface.Enable = true;// Select exchanged dataparameters.Rtde.Enable = true;parameters.Rtde.Frequency = 500; // Hzparameters.Rtde.InputSetup.Add(RtdeInputData.InputDoubleRegisters, 42);parameters.Rtde.InputSetup.Add(RtdeInputData.StandardAnalogOutput0);parameters.Rtde.OutputSetup.Add(RtdeOutputData.ActualTcpPose);parameters.Rtde.OutputSetup.Add(RtdeOutputData.ActualTcpSpeed);parameters.Rtde.OutputSetup.Add(RtdeOutputData.ActualTcpForce);parameters.Rtde.OutputSetup.Add(RtdeOutputData.ActualCurrent);parameters.Rtde.OutputSetup.Add(RtdeOutputData.InputIntRegisters, 0);// Enable Dashboard commandsparameters.Dashboard.Enable = true;// XML-RPC server on port 50000parameters.XmlRpc.Enable = true;parameters.XmlRpc.Port = 50000;// Socket server on port 50001parameters.SocketCommunication.Enable = true;parameters.SocketCommunication.Port = 50001;// Enable SSH commands and filesparameters.Ssh.EnableSsh = true;parameters.Ssh.EnableSftp = true;parameters.Ssh.Username = "ur";parameters.Ssh.Password = "easybot";// Connect to the robotrobot.Connect(parameters);//...// Work with library//...robot.Disconnect();}}
public class ConnectParameters {public ConnectParameters()public ConnectParameters(string ip)public DashboardConnectParameters Dashboard { get; set; }public string IP { get; set; }public InterpreterModeConnectParameters InterpreterMode { get; set; }public bool PingBeforeConnecting { get; set; }public PrimaryInterfaceConnectParameters PrimaryInterface { get; set; }public RtdeConnectParameters Rtde { get; set; }public SocketCommunicationConnectParameters SocketCommunication { get; set; }public SshConnectParameters Ssh { get; set; }public XmlRpcConnectParameters XmlRpc { get; set; }}
Disconnect
The Disconnect() method stops all services.
Try it with the Windows example
Visit the Download page to get the latest desktop example.