Get started with LabVIEW
Prerequisites
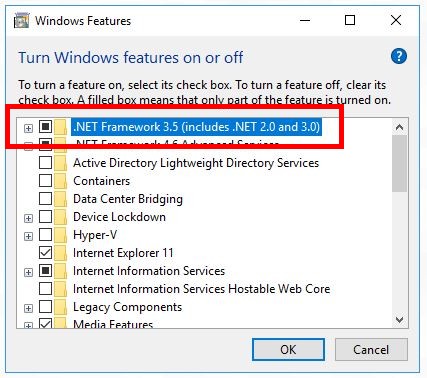
- You must have .NET installed on the same computer as LabVIEW (Go to the Windows "Turn Windows feature on and off" screen and check ".NET Framework 3.5)
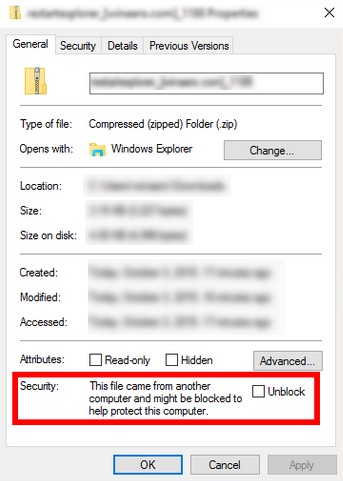
- Check that the DLL "UnderAutomation.UniversalRobots.dll" is not blocked in the properties of the file
- Then you can start :)
Download
You can download the latest version of the library from the GitHub repository or from the download page.
Features
Connect to the robot
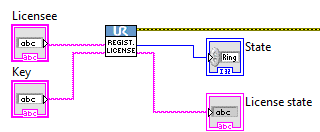
Register License (optional)
After downloading, you have 30 days to test the software.
If you purchase a license or request a license extension, you will receive a Licensee/key pair that unlocks the SDK. This information is confidential and must remain within your company.
If the 30-day trial period has expired, or if the license key is not or is no longer valid, an exception will be raised when calling the VI ConnectToRobot.
The VI RegisterLicense allows you to enter your license key into the library. This VI must be called before ConnectToRobot.
Connect
The VI ConnectToRobot will be documented in more detail for each interface below.
This VI allows you to select the robot interfaces you want to connect to, as well as the robot's IP address.
For Primary Interface and Dashboard, these are simple Booleans that indicate whether you want to use this interface. However, for RTDE or SFTP, an intermediate initialization VI allows you to configure the interface.
The ConnectToRobot VI returns an instance for each interface to connect to. An error on the error slot may be returned if the connection fails.
Finally, a Robot instance is also returned for use in the disconnect VI.
Disconnect
The VI DisconnectFromRobot allows you to disconnect all of the robot's interfaces.

Primary Interface
The Primary Interface is a low-level TCP/IP socket-based interface used to exchange real-time data between a Universal Robot and an external system. It allows users to monitor robot states, such as joint positions and speeds, and also to send control commands, like URScript script instructions.
The sample VI Examples/1.Primary Interface.vi allows you to test the functionality provided by Primary Interface.
Connect to Primary Interface
When calling the ConnectToRobot.vi VI, in addition to the robot's IP address, the Enable Primary Interface Boolean must be set to TRUE in order to obtain an instance of the connection to the Primary Interface as output.
Once this instance has been obtained, it will be used as input for the VIs described below.

The VI PrimaryInterfaceGetState then returns a Boolean value indicating whether the interface is connected :

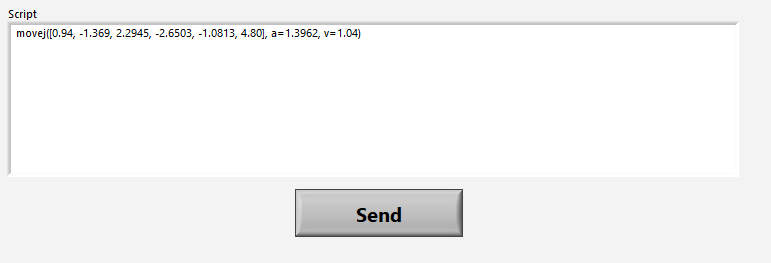
Send Script
The URScript language is similar to Python and was developed by Universal Robots.
The Primary Interface allows you to send lines of script to move the robot, control I/Os, etc.
There is no execution success return. The robot must also be in Remote mode and Powered On to accept move commands.
In UR Script syntax, it should be noted that:
- If a script line is sent, it stops the program currently running and is executed immediately.
- To execute multiple lines of URScript, the lines must be encapsulated in a
defblock. - To avoid stopping the main script and execute script lines in parallel, the lines must be encapsulated in a
secblock. However, it is not possible to execute move/instructions in this block.


Get robot state
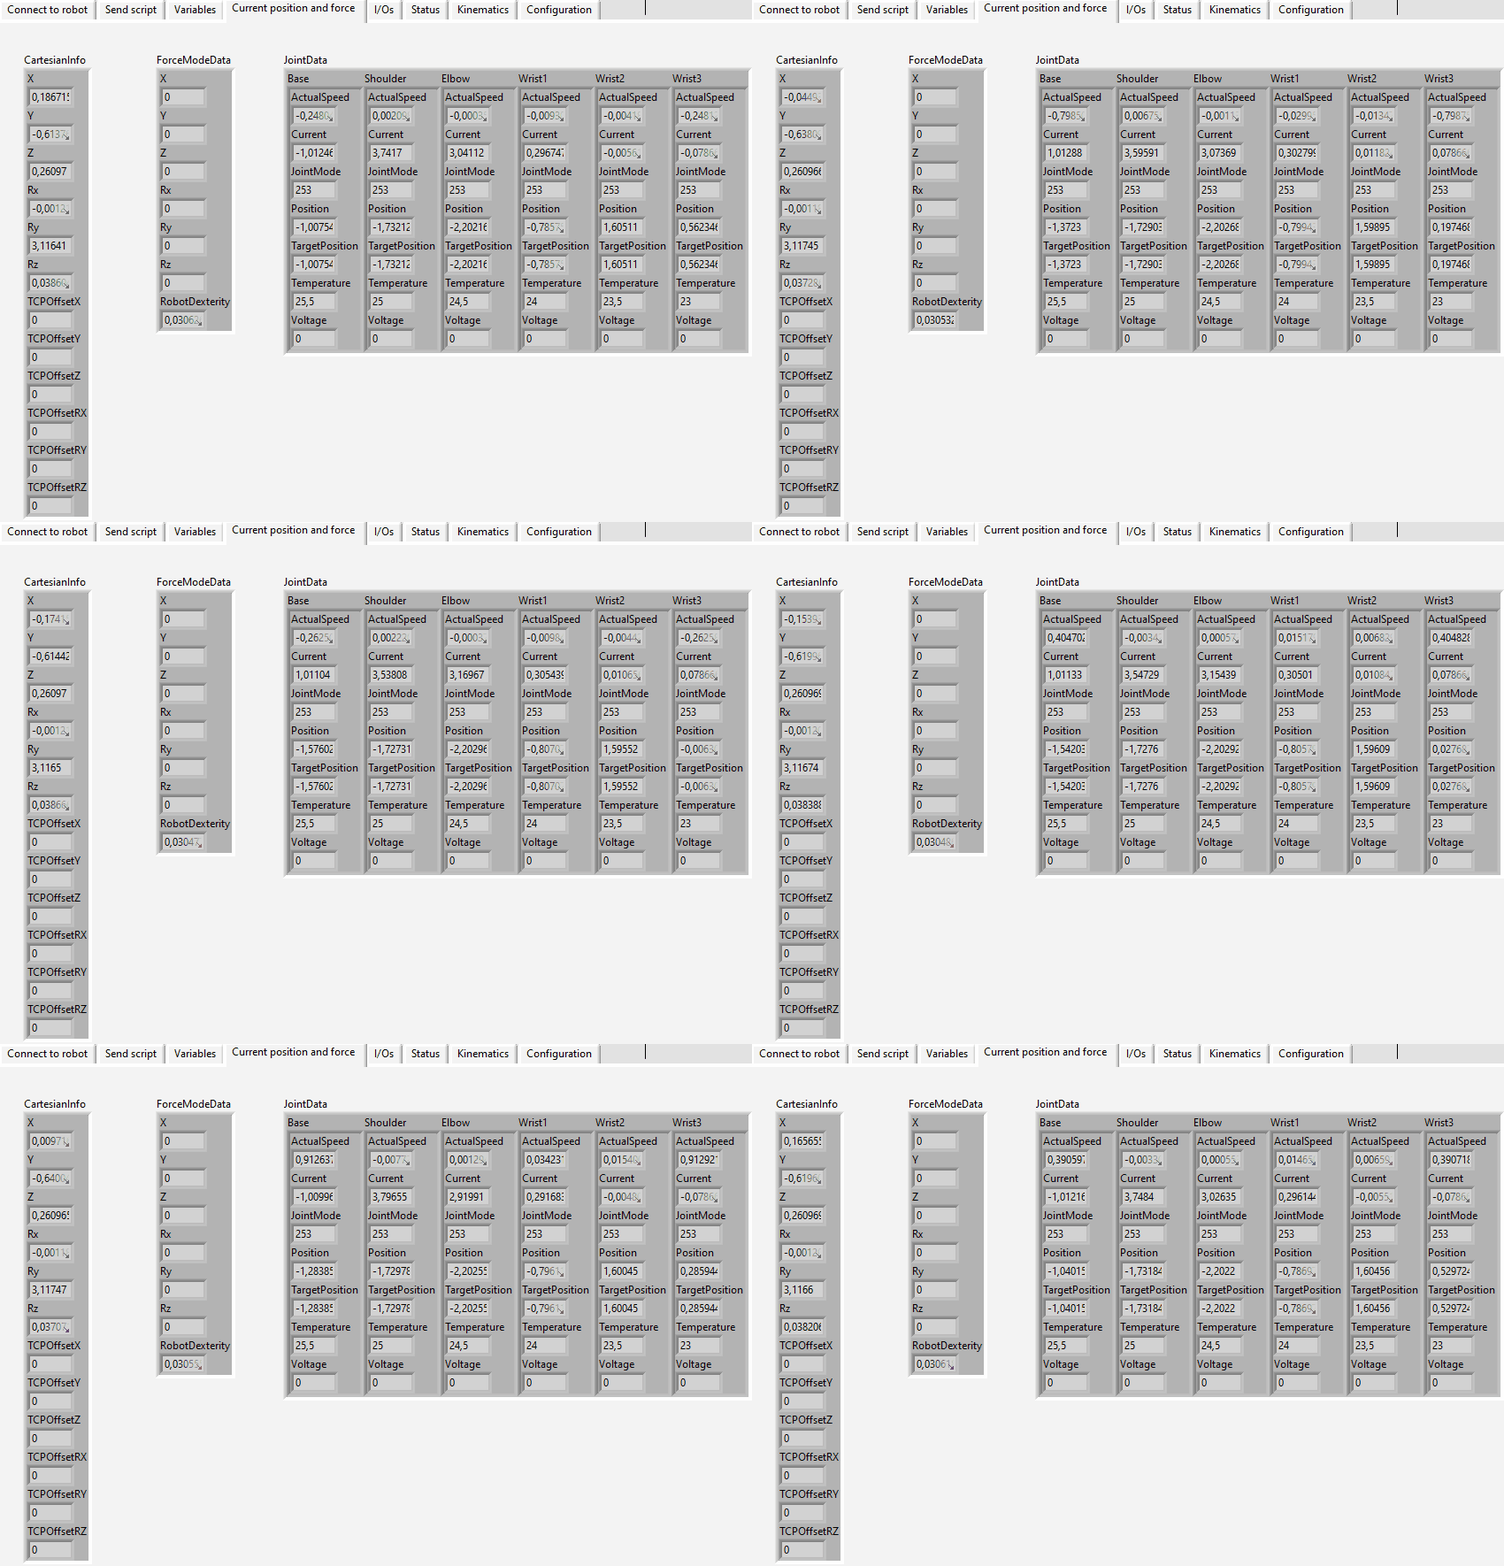
The robot's status is received every 100 ms (at 10 Hz).
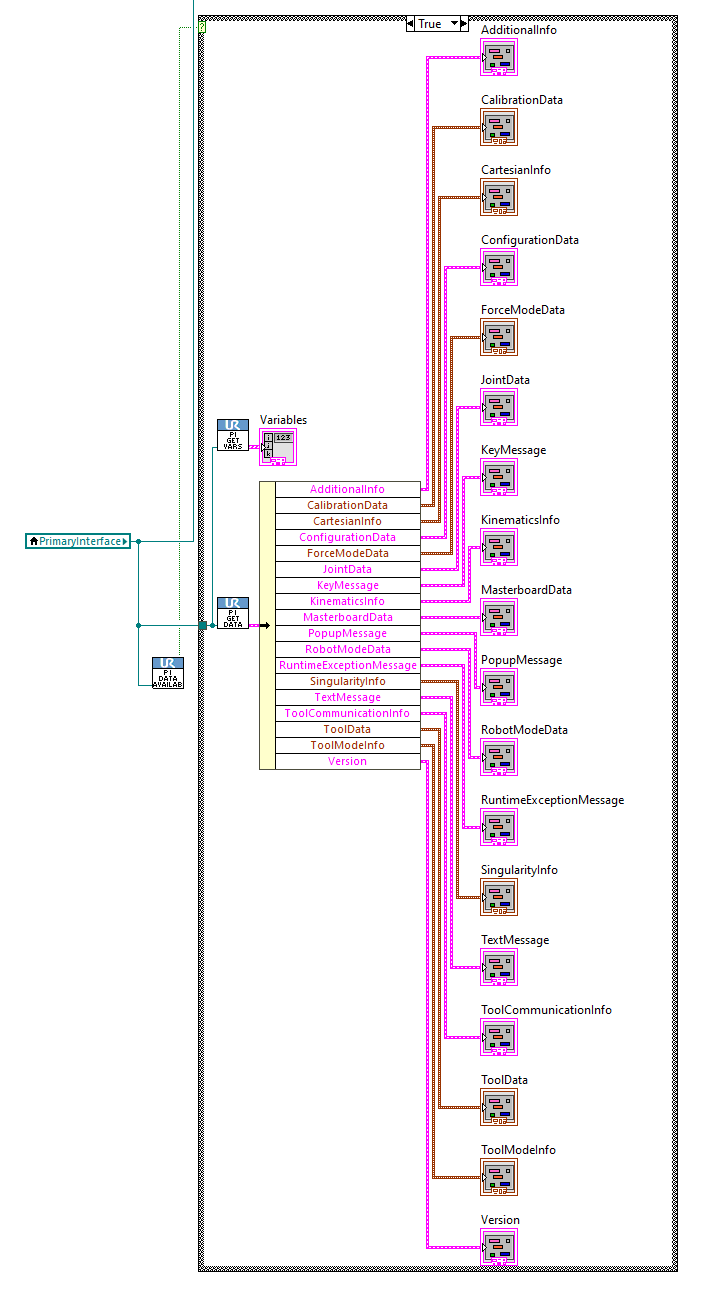
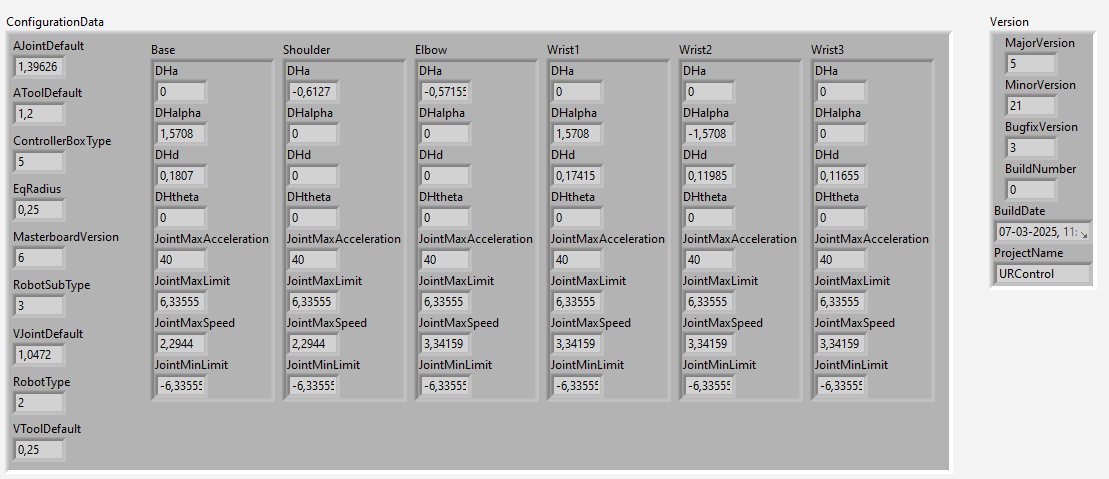
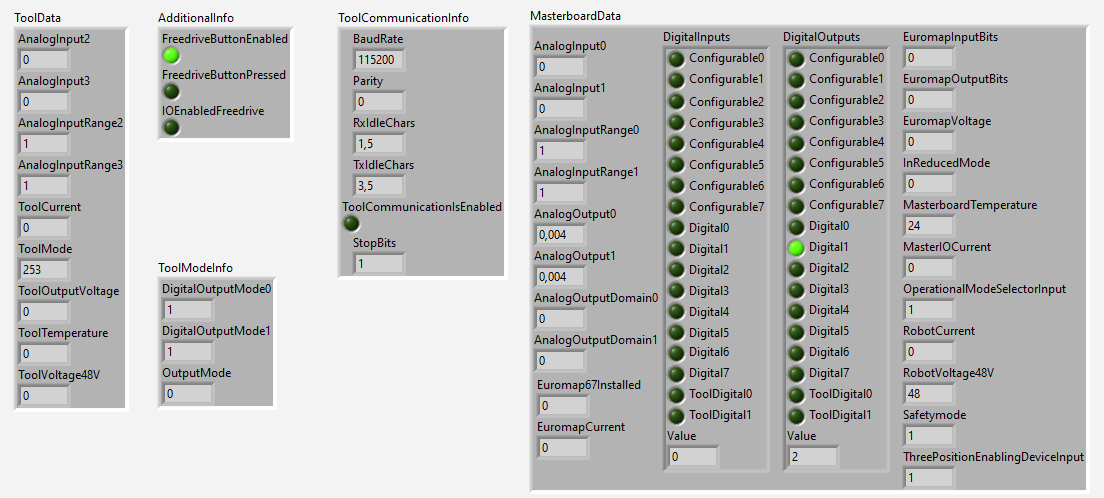
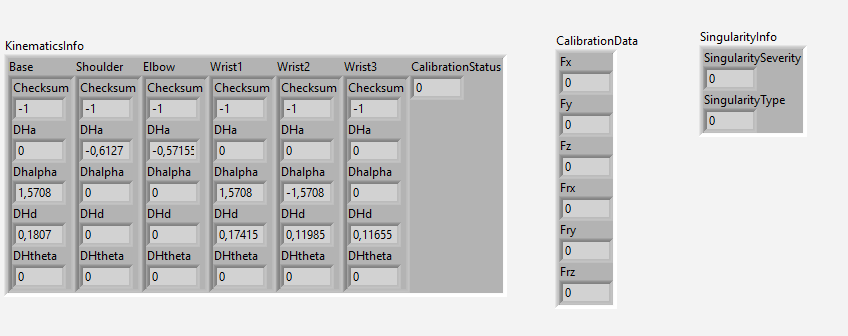
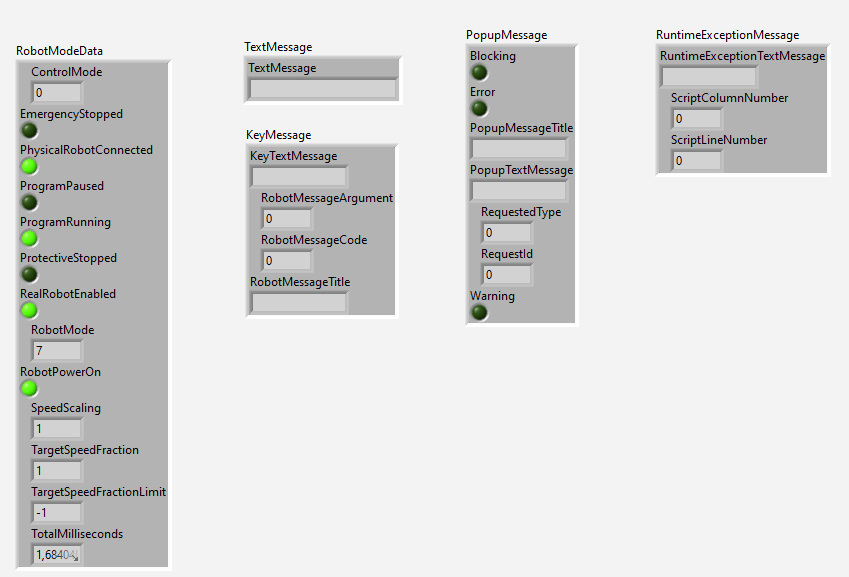
It consists of numerous packets containing information, which are presented in LabVIEW in the form of clusters.
The VI PrimaryInterfaceIsNewDataAvailable indicates whether new data has just been received.
If so, the VI PrimaryInterfaceGetData allows this data to be retrieved in a cluster.
Robot program variables
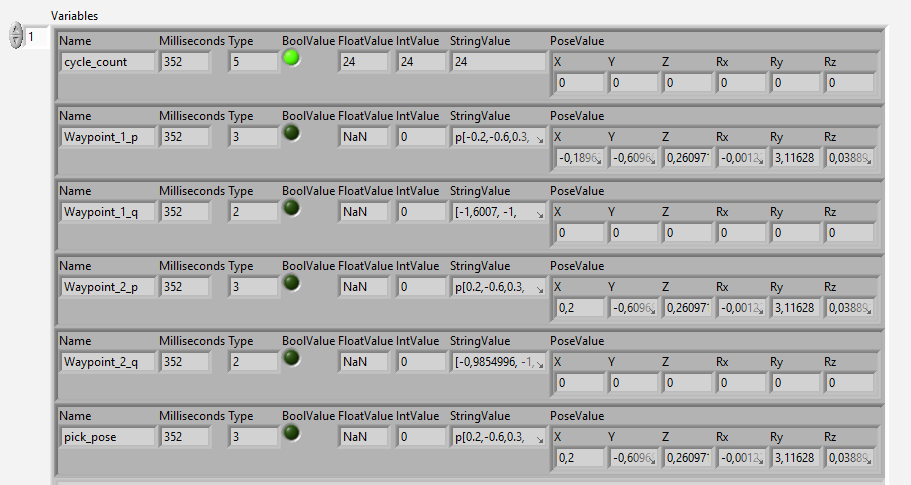
In addition to the previous data, the VI PrimaryInterfaceGetVariables allows you to obtain a list of program variables currently in use in the current robot program. Please note: Primary Interface must be connected when the program starts in order for the list to be updated.

RTDE : Real-Time Data Exchange
RTDE (Real-Time Data Exchange) allows you to exchange data and measurements with the robot at high speed, up to 500Hz on the latest cobots.
The sample VI Examples/2.RTDE.vi allows you to test the functionality provided by RTDE.
Initialization
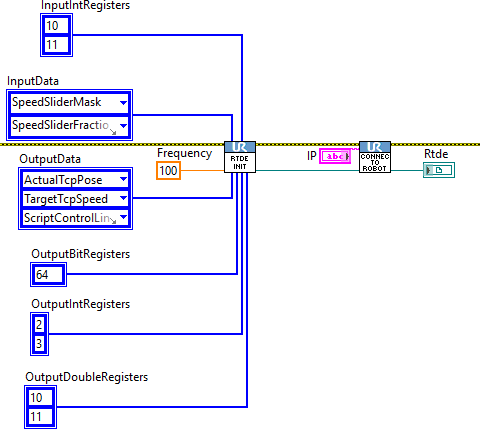
The VI RtdeInitialize allows you to create the RTDE connection parameters that must be passed in addition to the IP address to the VI ConnectToRobot.
The following must be specified as input to RtdeInitialize:
- The data reception frequency (up to 500Hz)
- The outputs you want to receive (i.e., the measurements sent by the robot to LabVIEW)
- The inputs you want to write from LabVIEW to the robot controller.
The inputs are entered in the top slots, while the outputs are entered in the bottom slots. Each slot is a list of either enumerated values or integers for each type of register.
An RTDE instance is thus obtained at the output of the VI ConnectToRobot.
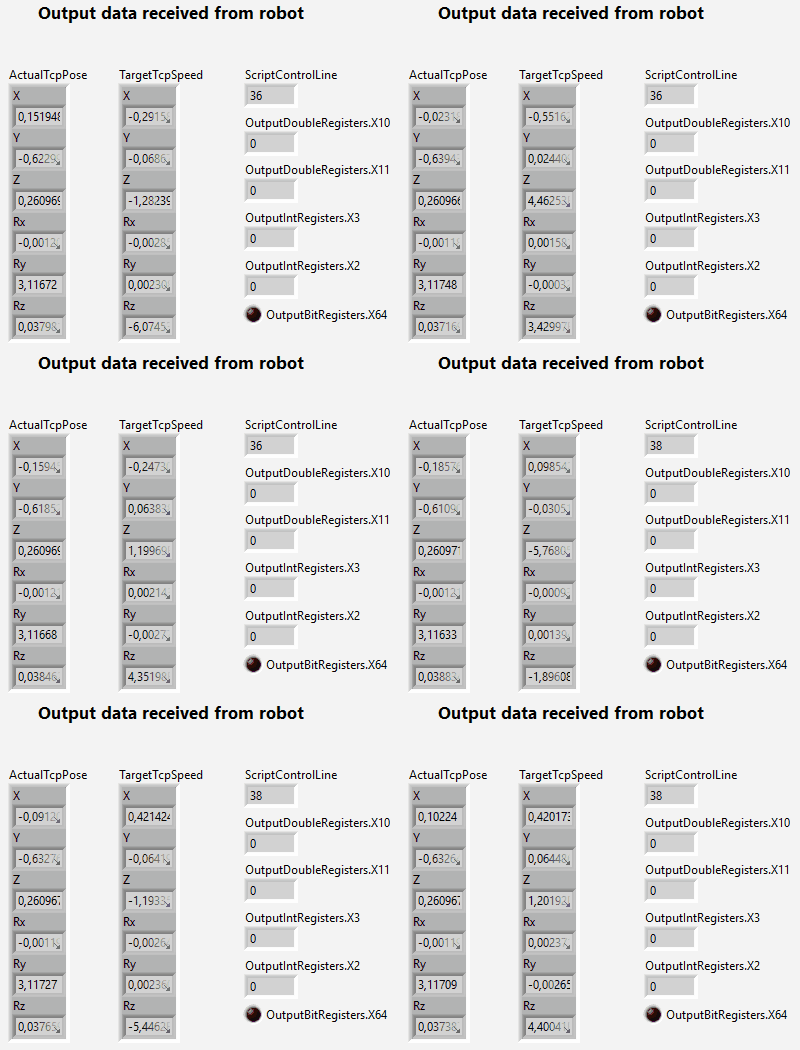
Read data
The VI RtdeIsNewDataAvailable indicates whether new RTDE data has been received.
If so, calling the VI RtdeGetData returns a cluster containing all RTDE data, but only the data subscribed to during connection is refreshed.
Write data
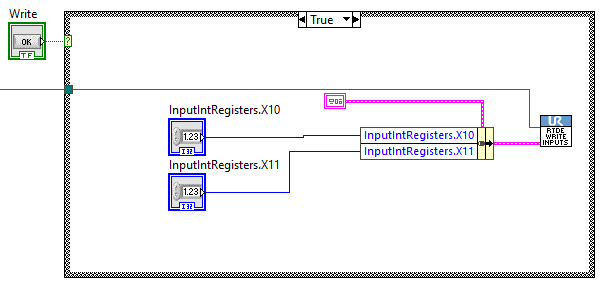
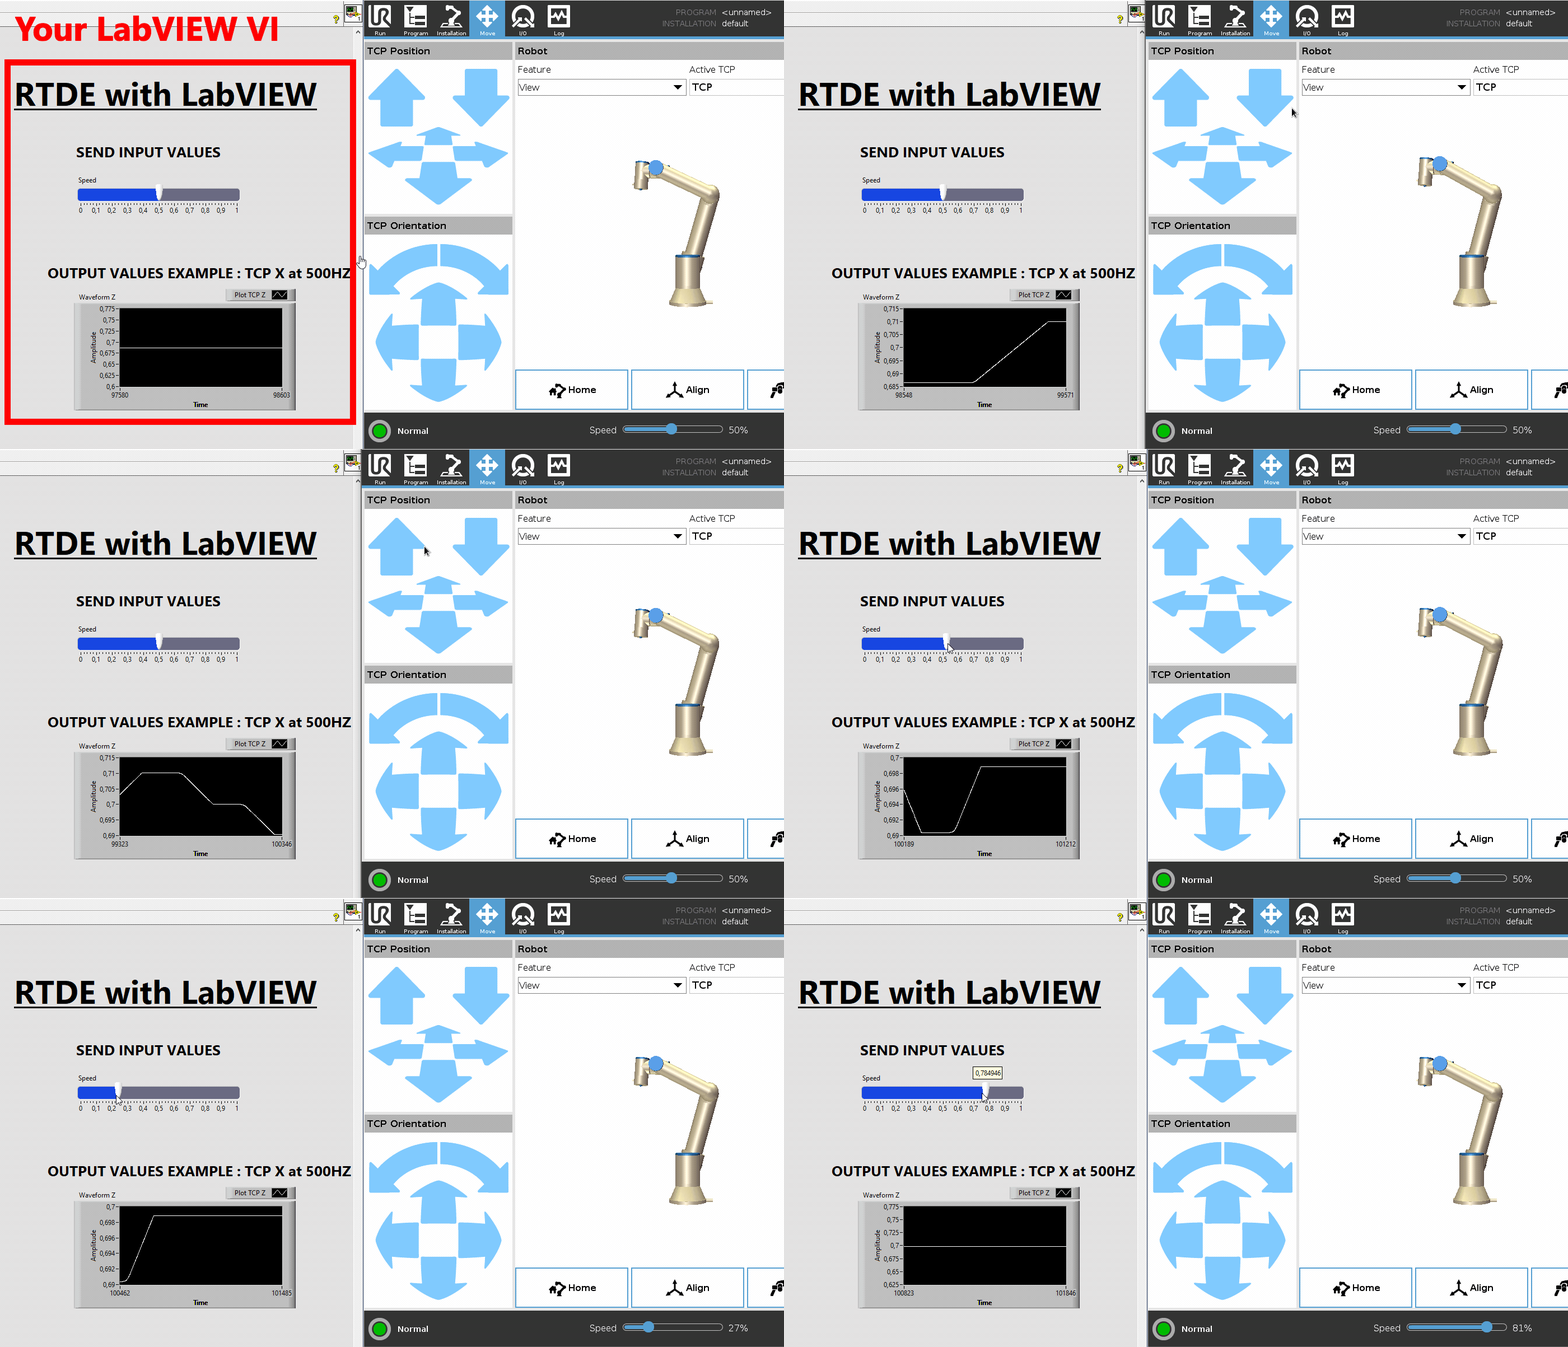
The VI RtdeWriteInputs allows you to write the data you subscribed to when you connected.
Dashboard Server
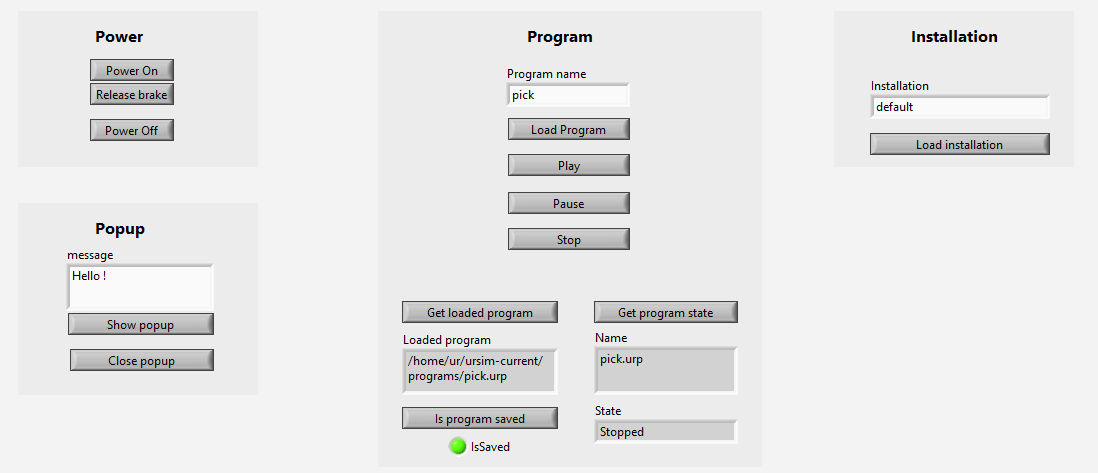
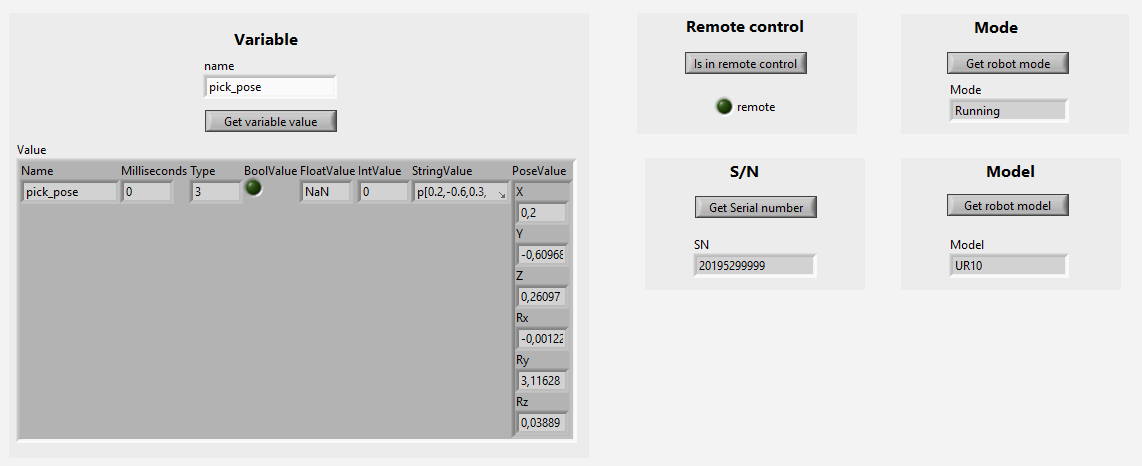
Dashboard allows commands to be sent to remotely control the robot.
The sample VI Examples/3.Dashboard.vi allows you to test the functionality provided by the Dasboard interface.
A Dashboard instance is obtained at the output of the ConnectToRobot VI if the Enable Dashboard Boolean has been set to TRUE.
- DashboardPowerOff.vi: Powers off the robot system.
- DashboardPowerOn.vi: Powers on the robot system.
- DashboardAddToLog.vi: Adds a custom message to the robot's log file.
- DashboardClearOperationalMode.vi: Clears the current operational mode setting.
- DashboardShowPopup.vi: Displays a custom popup message on the robot's interface.
- DashboardClosePopup.vi: Closes an open popup window on the robot's interface.
- DashboardCloseSafetyPopup.vi: Closes the safety-related popup displayed on the robot.
- DashboardGetLoadedProgram.vi: Retrieves the name of the currently loaded program.
- DashboardGetOperationalMode.vi: Gets the current operational mode of the robot.
- DashboardGetPolyscopeVersion.vi: Returns the version of the PolyScope software installed on the robot.
- DashboardGetProgramState.vi: Retrieves the current state of the loaded program (e.g., running, paused, stopped).
- DashboardGetRobotMode.vi: Gets the current mode of the robot (e.g., Power Off, Idle, Running).
- DashboardGetRobotModel.vi: Returns the model type of the connected robot.
- DashboardGetSafetyStatus.vi: Retrieves the current safety status.
- DashboardGetSerialNumber.vi: Gets the robot's serial number.
- DashboardGetVariable.vi: Reads the value of a global variable from the robot.
- DashboardIsInRemoteControl.vi: Checks if the robot is currently in remote control mode.
- DashboardIsProgramSaved.vi: Verifies if the currently loaded program has been saved.
- DashboardLoadInstallation.vi: Loads a specific robot installation file.
- DashboardLoadProgram.vi: Loads a robot program from the file system.
- DashboardPause.vi: Pauses the currently running program.
- DashboardPlay.vi: Starts or resumes the loaded robot program.
- DashboardReleaseBrake.vi: Releases the brakes on the robot joints.
- DashboardRestartSafety.vi: Restarts the robot's safety system.
- DashboardSetOperationalMode.vi: Sets the robot's operational mode.
- DashboardShutdown.vi: Initiates a full system shutdown of the robot.
- DashboardStop.vi: Stops the currently running program.
- DashboardUnlockProtectiveStop.vi: Unlocks the robot from a protective stop condition.
SFTP
SFTP (Secure File Transfer Protocol) is a protocol on SSH that allows to create, read, update, delete (CRUD) files and folders on the robot controller.
This feature is made possible because an embedded Linux is running in the robot.
The sample VI Examples/4.SFTP.vi allows you to test the functionality provided by Primary Interface.
Connection
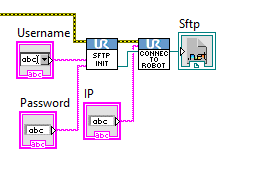
The VI SftpInitialize must be passed as input to ConnectToRobot in order to specify the user and password for the SSH connection that enables the SFTP link.
This results in an SFTP instance that can be used as input for the following VIs.
Manipulate files
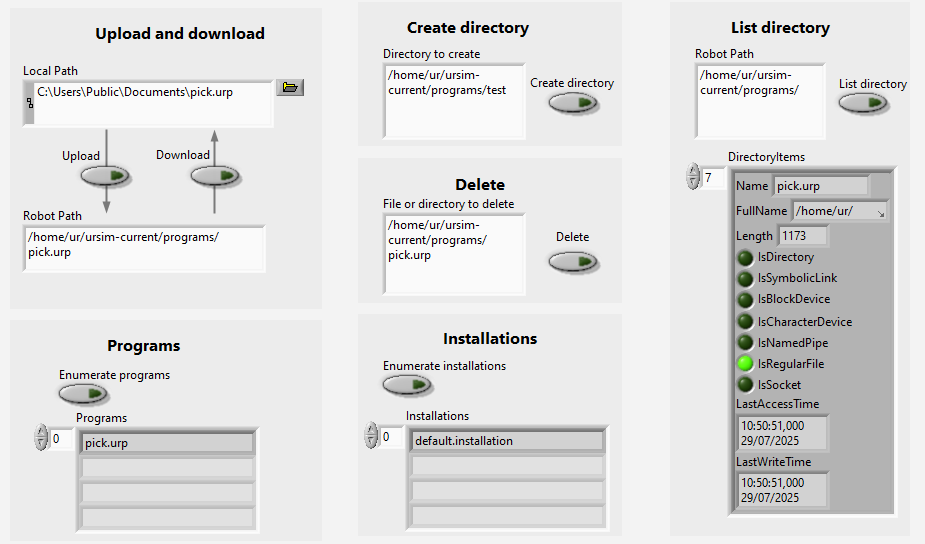
The following VI allow you to manage files and directories :
- SftpCreateDirectory.vi: Creates a new directory on the robot's file system via SFTP.
- SftpDelete.vi: Deletes a specified file or directory on the robot using SFTP.
- SftpDownloadFile.vi: Downloads a file from the robot to the local system via SFTP.
- SftpEnumerateInstallations.vi: Lists all installation files available on the robot.
- SftpEnumeratePrograms.vi: Lists all program files stored on the robot.
- SftpListDirectory.vi: Retrieves the list of files and directories at a specified robot path.
- SftpUploadFile.vi: Uploads a file from the local system to the robot using SFTP.


🔍 Compatibility
- ✅ Robots: UR3, UR5, UR10, UR16, UR20, UR30, CB-Series, e-Series, Polyscope, Polyscope X
- ✅ LabVIEW : from 2010
Under the hood
The library is based on LabVIEW's native functions that allow the execution of .NET code. More information : https://zone.ni.com/reference/en-XX/help/371361R-01/lvconcepts/using__net_with_labview/
However, the library has been tested and optimised for ease of use in LabView.